Deep diving in every nook and corner often finds you something crazy.. Isn’t it? Here are 5 crazy tricks dug from nooks and corners of Excel. Enjoy!
1. What happens when Zoom is less than 40% ?
Assume that we have a few named ranges in a sheet
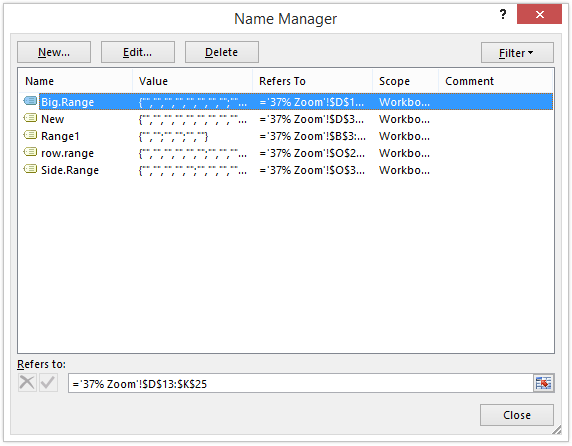
Now this is what happens if you zoom out to less than 40%
![]()
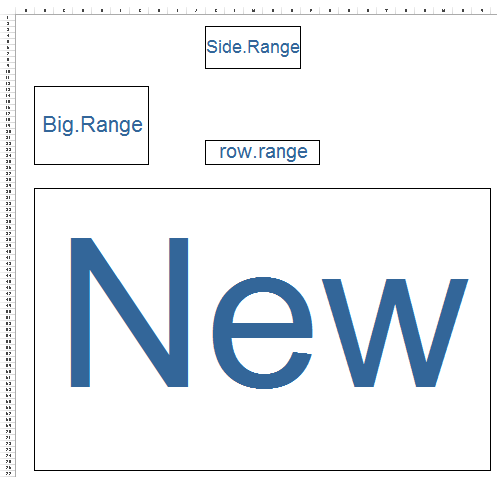 --> All named ranges appear
You would see that all the named ranges show up when the sheet is zoomed out to less than 40%. I think in older versions of Excel the cell/named ranges appear only at 37% zoom level
2. A Smart alternative to merging cells
People often merge the cells when the need is to center align a text between the cells. Merging is fine but the problem is that only the top left cell address prevails over the rest cells merged

- Select the cells where you to center align the text
- Press Ctrl +1 to open up the Format Cells Box
- Under Alignment Tab, choose the horizontal alignment as ‘Center Across Selection‘
- Excel will center align the text without merging
3. Automatically name the cells
I am sure you know about cell naming in excel. If you don’t you can learn it here. Now what happens when you are required to create dozens of named cells?
It can be quite a task to type each name in the Name Box or instead you can create all names automatically using Create from Selection Technique
Let’s say we have a couple of cells that we have to name
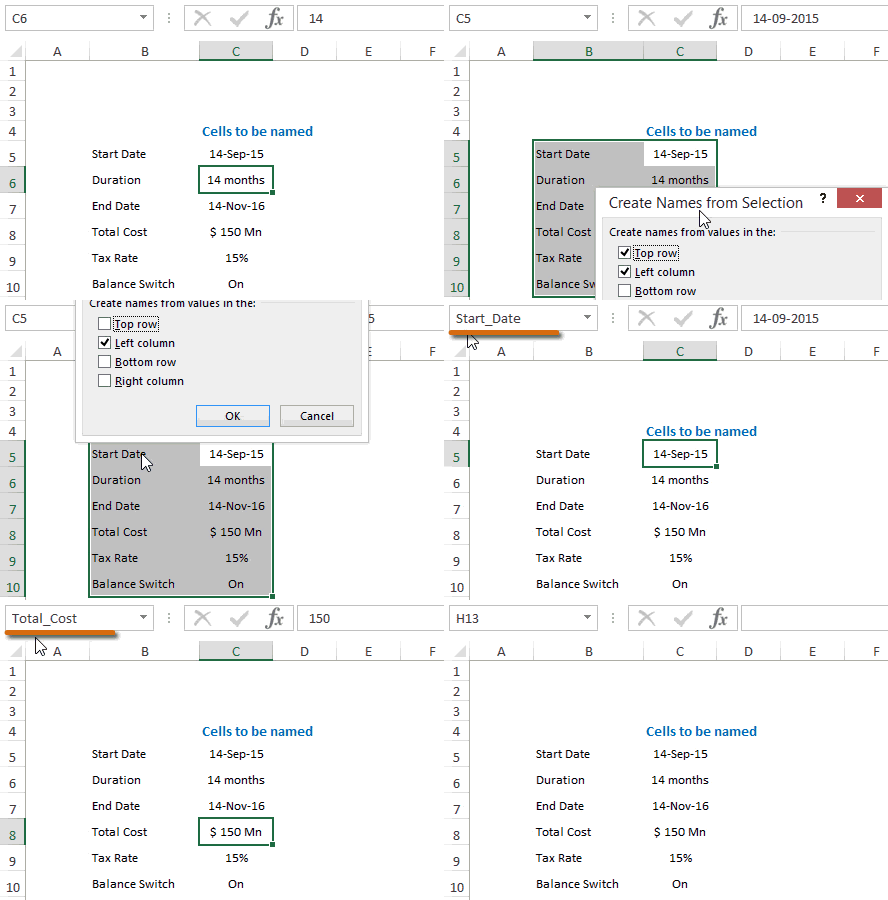
- Select the cells to be named and the cells that contain the names
- Go to the Option ‘Create from Selection’ in the Formulas Tab. Alternatively use the shortcut CTRL+SHIFT+F3
- Check the relevant box where cells names are kept
- Click Ok and you are done. All the selected cells will be automatically named
4. How to select all charts on the Sheet
As of now I am talking about Charts but you can select any object. It could be shapes, charts etc.. all of them together
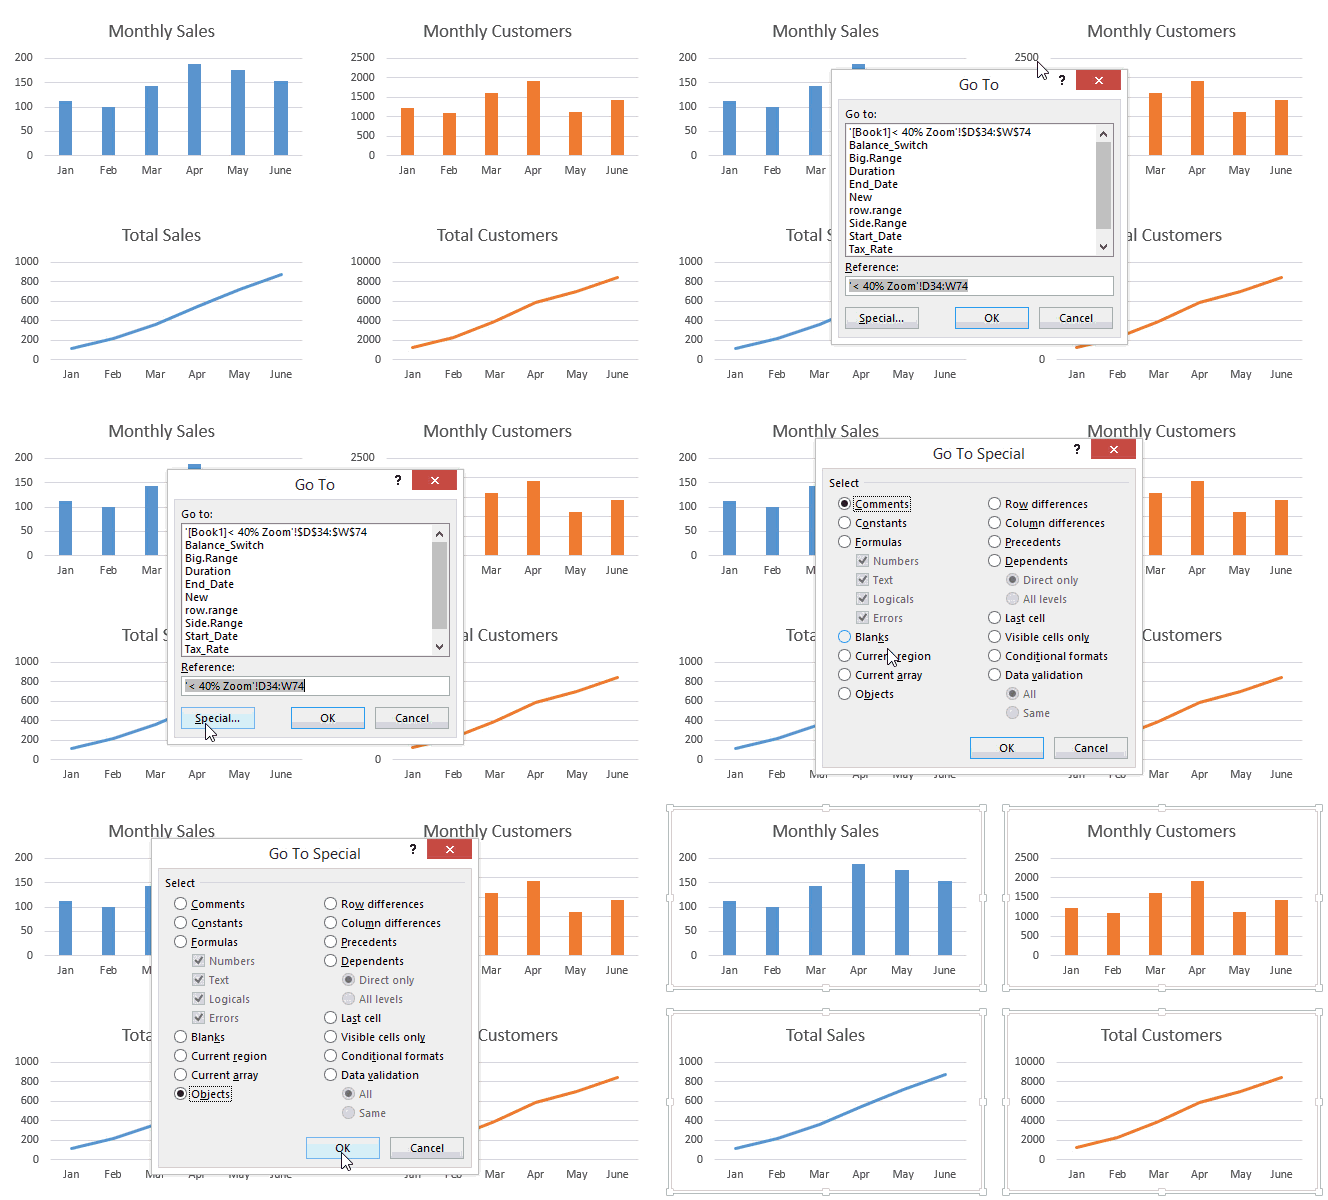
- Press the F5 key or use the shortcut Ctrl+G to open the Go To Box
- Click on Special
- Pick up the option Objects and click Ok
- All objects (Charts, Shapes) will be selected at once
5. Alternative to hiding rows or columns
I have often seen analyst hiding rows that contain backup data. The problem is that our eyes intuitively don’t go to row numbers to figure out that if some rows are hidden.
A smart alternative is to group the rows. Assume some sales coming from different sources
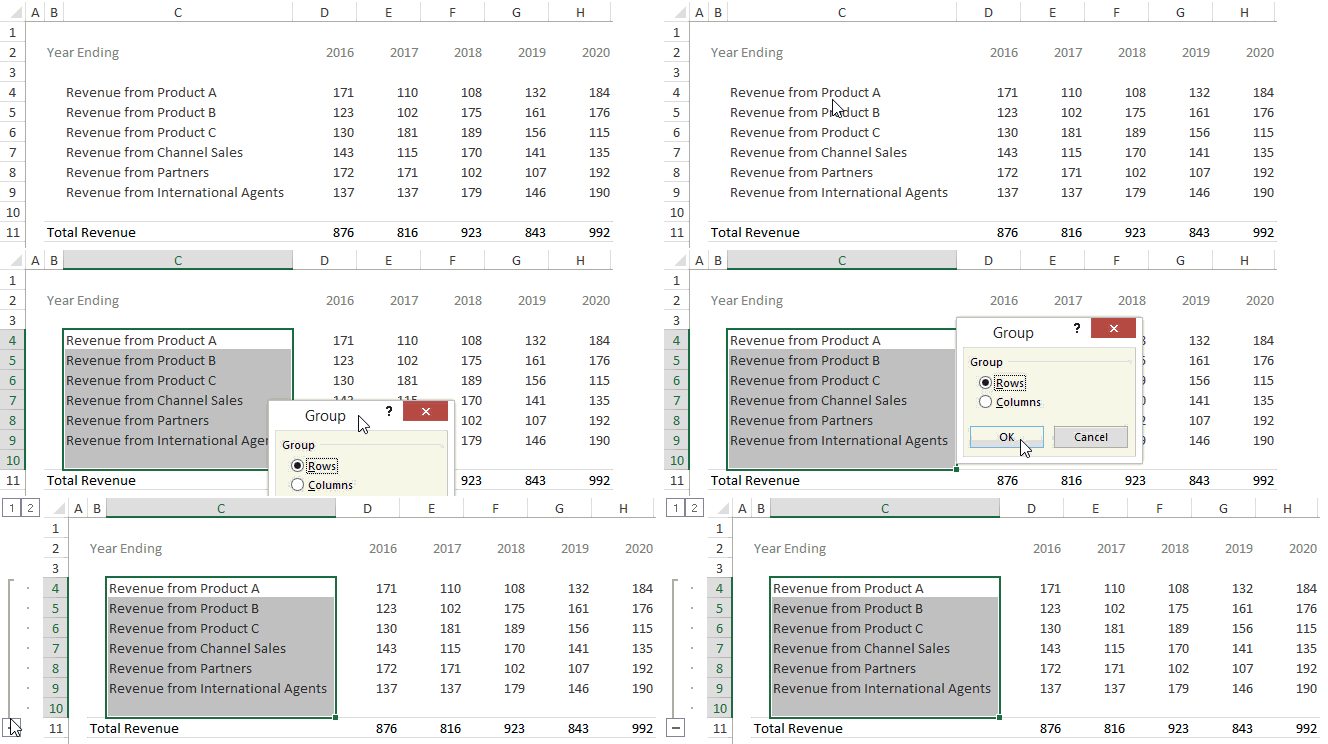
- Select the rows you want to Group
- In the Data tab click on Group
- Then pick one of the option Group Rows or Columns
- Depending on what you are grouping (rows or columns) you’ll see an expand/collapse button that will hide or unhide the rows or columns when needed
More Excel Tricks and Tips
- Hiding Options in Excel
- 10 Excel Habits you Must Develop
- Screen Editing Options in Excel
- 5 Awesome Data Formatting Tips
