A while ago I wrote a post on how to use Advanced Filter? Today let’s delve further into a bit of automation of the advanced filter application
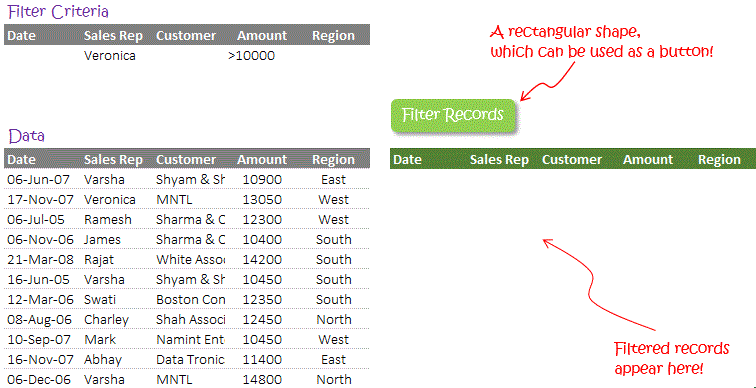
Here is the Setup of the Data

Converting Data into Tables
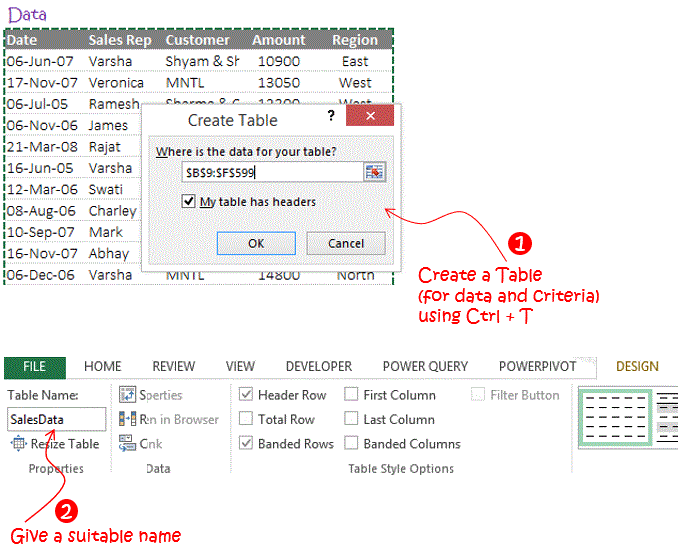
All you got to do is to convert the data (list and criteria range) into excel tables

- Select the data and Press Ctrl + T (to convert the range into Tables)
- Give your table a name (for example SalesData) in the Design Tab (extreme left)
- Just as way we have converted the data into a table called SalesData. Convert the Criteria (headers + one row) into a table called “Condition”
The reason why we convert the data into excel tables is because excel tables will automatically expand (and include additional data) in case you paste more data (underneath the original data). This features makes the automation works beautifully even when new data is added!
Here comes a tiny code
Sub Myfiltermacro()

Range('SalesData[#All]').AdvancedFilter Action:=xlFilterCopy, CriteriaRange:= Range('Condition[#All]'), CopyToRange:=Range('H9:l9'), Unique:=False

End Sub
Just in case you have different table names or ranges, you can change the text in blue. Copy this code and do the following for this code to run

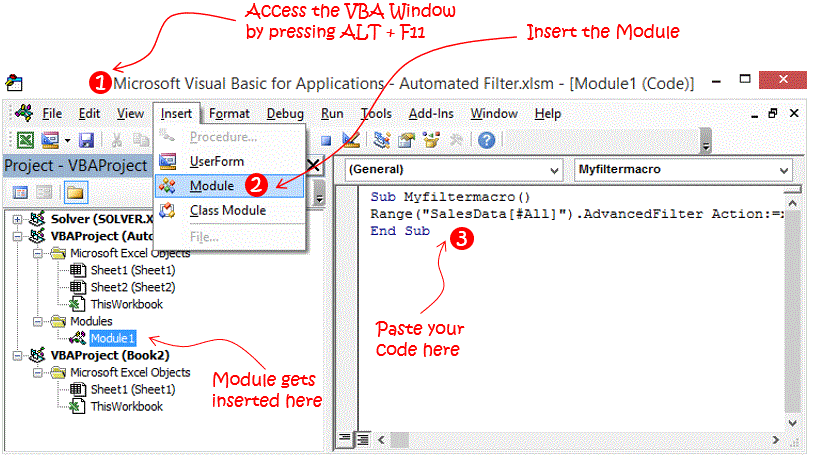
- Open the VBA window. Use the shortcut ALT+F11
- From the Insert drop down in the Menu bar, click on Module
- In the empty space, paste the code and close the Visual Basic window
Link the Macro to the Button
We would now link the macro we created to the button on the sheet

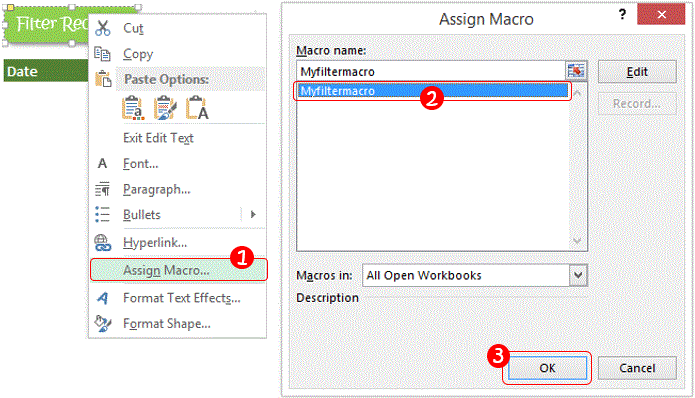
- Right Click on the button and choose Assign Macro
- Select the Macro
- Click OK
- Your automated filter is ready to use now 🙂
Download the Completed File from Down Below. Note that the extension of the file containing a macro is “.xlsm”
Some Quick VBA Codes for you
