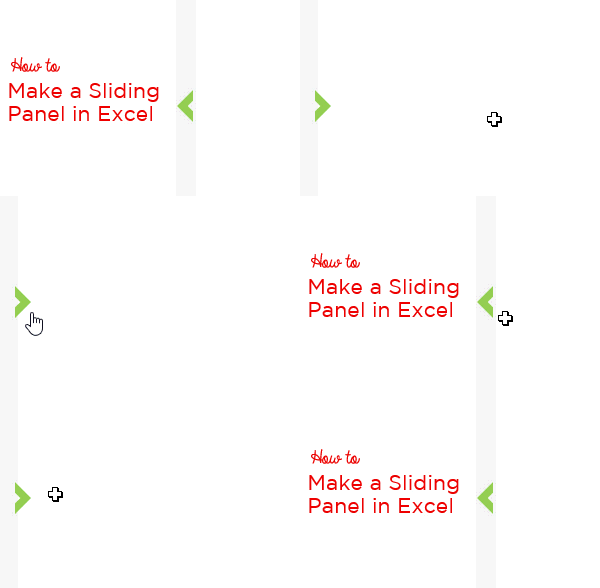
 --> Cool, Isn’t it?
The other day I used the sliding panel technique in a Dashboard and it turned out pretty well. It acted like a control panel for all settings and options of my Dashboard! Let me show you how to set this up in your spreadsheet
Let’s Set up the Spreadsheet
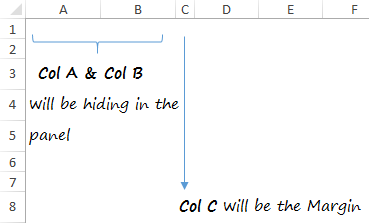
- Assume that we will be making a panel out of Col A and Col B and Col C will act like a margin
- Also note that I have reduced the width of Col C to 2 points to make it look like a margin
Next let’s get that arrow
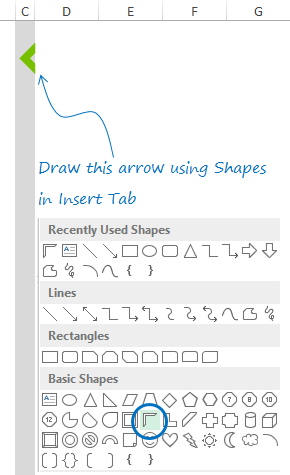
- Let’s use the Shapes (in Insert Tab) to make a small arrow that will act like an intuitive button to open or close the panel
- Also note that the arrow should change its direction depending on whether the panel is open or closed. We’ll take care of that in the VBA code
- Also note that I have filled Col C with grey color
Naming the Arrow
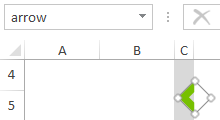
- Let’s name the arrow as “arrow”. This will help us fetch the object easily while writing the VBA code
- The process of naming the objects is the same as naming the cells
Now comes the code
Sub SlidingPanel()
If Range('A:b').EntireColumn.Hidden = False Then
 ActiveSheet.Shapes.Range(Array('arrow')).Select
 Selection.ShapeRange.IncrementRotation 180
 Range('A:B').EntireColumn.Hidden = True
 Range('a1').Select
Else
 ActiveSheet.Shapes.Range(Array('arrow')).Select
 Selection.ShapeRange.IncrementRotation -180
 Range('A:B').EntireColumn.Hidden = False
 Range('a1').Select
End If
End Sub
Now copy this code and paste it in the VBA window. Follow the steps
- Use the shortcut ALT + F11 to open the VBA window
- From the Insert Menu (in the VBA window) click on Module
- A blank module (place to write the code) will be inserted
- Paste the code in that window and close the VBA window
- Note that blue & bold part of the code is editable. You can change the columns to customize which ever columns you want in your panel
Link the arrow to the Macro

- Right click on the arrow and go to Assign Macro
- Select the Macro that you have just copied and pasted
- And you are good to go!
Quick Tip : Application of Sliding Panel
Obviously we have created this panel to hide something that we may not need on the screen too often, something like a control panel. So I am assuming that you’ll be putting Slicers, Text, Form X Controls in here and we want those objects to adjust as per the panel.
To make the object adjust to the panel automatically follow the steps
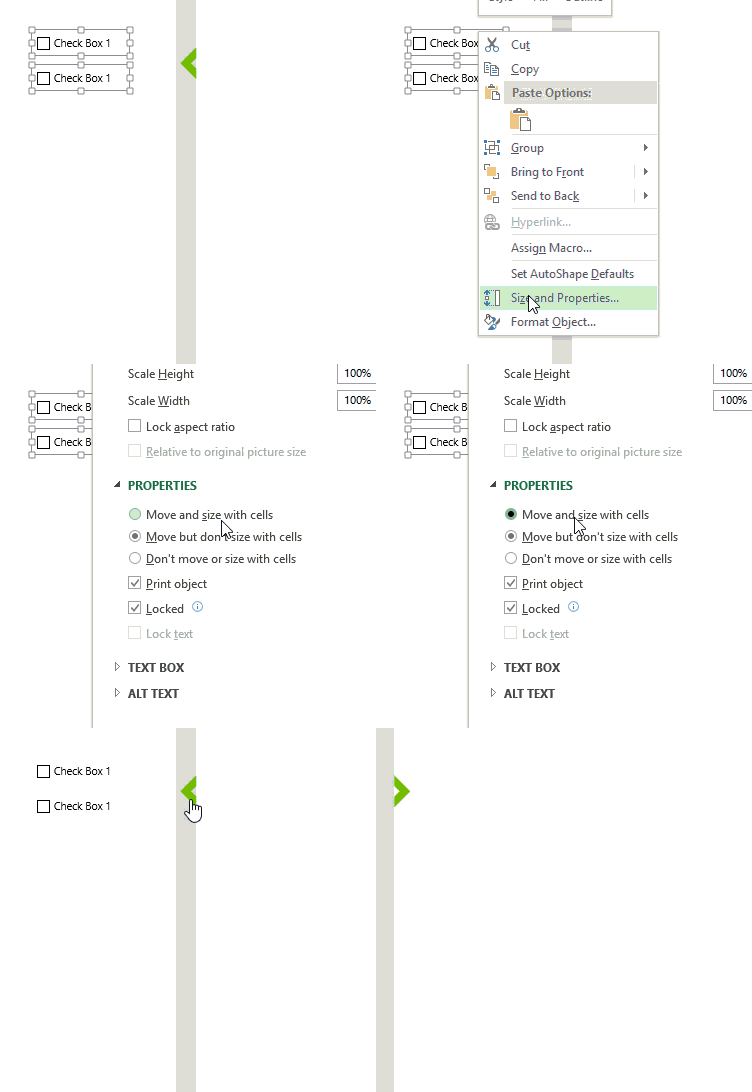
- Right click on the object (could be any object that is placed inside the panel)
- Go to Size and Properties
- Under Properties click – “Move and Size with Cells”
- All the objects will be now be moving & re-sizing along Col A & Col B (which is our Panel)
Other Useful Macros